by Alison Stapleton
Tech Essentials
I’ve had an iPad for several years now and I’ve been frustrated with the big bulky and clunky hard cases sold in the Apple Store. They are not neat and they make the whole item seem bigger than it is.
If the iPad designers made such a sleek and smooth piece of kit why would you want to hide it all in a nasty plastic flap thingy?
You are probably like me and you need the information and connectivity the Ipad gives without the bulk of junky covers.
I take my iPad with me most days and slip it into my bag. In fact these days I don’t buy a handbag or tote that will not fit my IPad.
I had worked on several prototype designs made in crochet for my IPad cover but they all had the same problem that the sleek pad would just slip right out.
This was not good.

Carleton Nip and Tuck iPad Cover
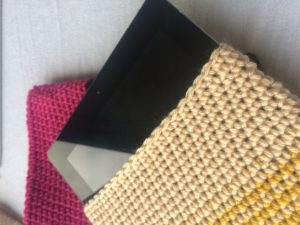
This new design is based on the simple pillow case method where the case is snug (nip) and then you ease the inner flap (tuck) over the end so the iPad will not slide out.
Our Carleton iPad Crochet Cover has no external flaps or buttons to catch on other things.

No matter who you are or how you crochet you will likely have an iPad. If you are a crocheter you can make this easy breezy iPad cover in less than three hours.
And if you don’t have an iPad I bet your grandkids do.

Materials
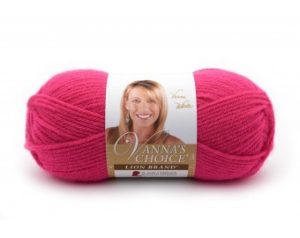
Made from Vanna’s Choice by Lion Brand or any other 4 weight yarn.
2 x 50g balls, one in black and one in pink.
Size 5.25mm crochet hook or the hook required to match the gauge.
Your label (optional)
Yarn needle to sew in ends.
Stitch marker.
Gauge
15 stitches and 12 rows to 4″ x 4″ (10cm x 10cm).
Measurements
Width 17cm, height 23cm.
Note: When resting and by that I mean when the iPad is not in the cover, the cover is slightly smaller than the actual iPad.
Pattern Notes
This cover is worked in the round and after the first row the work spirals up and is not round by round. There is no seam.
The fit is a snug fit to grip the iPad the cover will stretch a little as you insert the iPad this is normal.

Colour choices
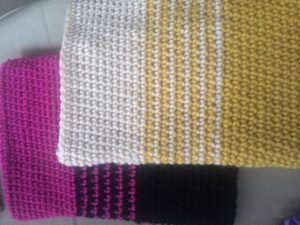
The pattern here is for the black/pink version but I am also showing you the gold/cream colourway. When you use colour in crochet it changes the feel of the item.
The black/pink is vibrant and businesslike and the gold/cream is lighter and has more whimsey.

Stitches used
Chain – ch.
Slip stitch – sl st.
Single crochet – sc.
Learn more about the five basic crochet stitches you need to know.
Pattern
Please note: This pattern will be free for just over a week and then be available as a PDF download for a nominal fee.
Body
Foundation chain: With black ch 24.
Rnd 1: Ch 1 (as 1st st), 1 sc in every chain to end (24 sts), 2 sc into same st (as side corner), 1 sc into every st up the other side, 2 sc into same st, (52 sts). Do not join with sl st. Place a stitch marker into next st.
Rnd 2: Immediately make the next st into the first st of rnd 1 and continue in a spiral from here.
Work until completed 12 rnds and end at stitch marker side. Leave black (do not cut),
Join pink, work 1 sl st into next 2 sts then continue in sc, complete one rnd, leave pink, pick up black and work 1 sc into each of the sl sts from the rnd below and then continue.
From this point you will have two spirals (one pink and one black) with two thread in use. Continue until you have five pink and five black rnds completed. End at the stitch marker side. With black make 1 sl st into the next 2 sts. Cut black and fasten off.
With pink continue and work every st and go over the 2 black sl sts with sc all the way round. Continue spiral in pink for twelve more rnds. End at stitch marker side. Turn.
Inner flap
Row 1: 1 ch (as 1st st), 1 sc into next 24 sts, turn (25 sts).
Row 2-8: Repeat row 1. Fasten off.
Finishing
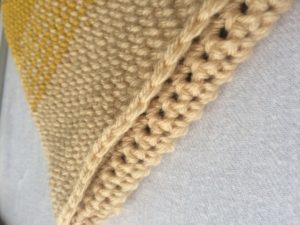
Turn item inside out. Fold flap down and neatly sew down both sides making sure not to go through to the front. Weave in ends. Turn right side out.
Sew on your label at the right hand side bottom 1cm in from the corner (optional).
