by Alison | Crochet Basics
Chainless Cast On
Base Chain Foundation
Typically the pattern will call for a chain of say, 40 or 100 chains, and the first row is built on the base chain.
In the chain-less cast-on method there is no chain.
I have also heard of this being called the chain less starting (crochet stitch) method CShdc, CSdc etc. which I may incorporate soon if that is the general term.
The chain-less cast on technique is used without a base chain so it provides some give in the item as a base chain can pull if not loose enough. Any tightness is only noticeable when you have worked up more of the item.
The first row is actually the base row and indicated as Row 1: on all patterns.
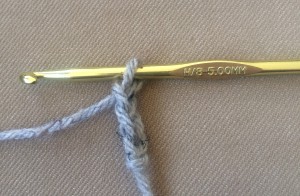
Row 1: 3 ch,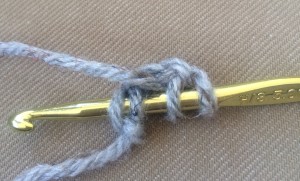
yarn over, insert hook in first ch (but both loops),
pull through (3 loops on hook),
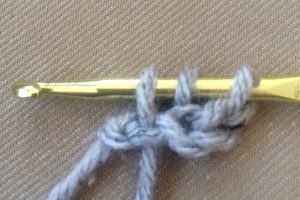
yarn over, insert hook into bottom stitch two “V” and pull through (3 loops on hook),
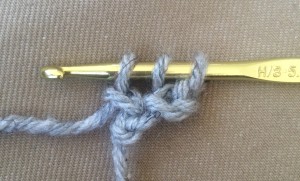
make 1 dc as normal inserting hook into both loops of previous loop pulled through.
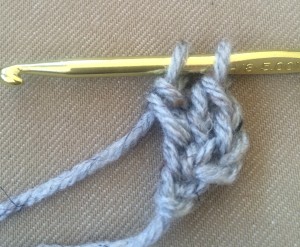
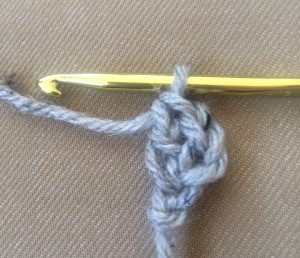
Each new double crochet is started in the one loop pulled through from the two on the base.
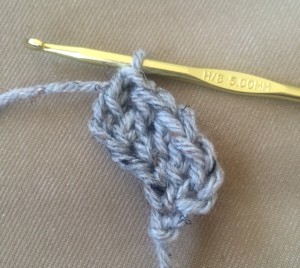
Continue for as many double crochets as required.
Where to Use the Chain-less Cast-on
This is great for waistbands on skirts and shorts. It also goes well for bag handles and straps for summer tops.
I don’t use it all the time but it does result in a really nice edge that has give and does not pull. In a way it is forgiving and I like that.
Author Bio
Alison Heathcote is a passionate crochet enthusiast and dedicated business blogger. She combines her love for crafting and entrepreneurship to inspire and connect with others.
With a knack for transforming yarn into beautiful creations and a flair for sharing valuable insights about running a successful crochet business, Alison embodies the perfect blend of creativity and practicality.
Read more about Alison’s crochet journey.
More Articles
If you enjoyed this post and crochet is your thing, you may like some other crochet articles from our blog.
by Alison | Crochet Basics, Crochet Patterns
Entrelac crochet
Entrelac crochet is a method of working on the side of previously crocheted pieces. The rows go in different directions and not just straight up. It creates an interesting piece and is strong. This method is usually done with color as the defining result.
Fair Isle crochet
Fair isle crochet is similar to Fair Isle knitting. Each row is worked with two colors and they change throughout the row to make designs in color. Each row has two different colors and the colors change every few rows.
For example:
Row 1: Red and blue
Row 2: Red and green
Row 3: Green and blue
But because each row only has two colors that sets the thickness of the finished item. The Fair Isles are in Scotland and women shepherdesses would tend their flocks of sheep with crochet hooks and balls of wool in their pockets. They would walk the highlands on foot working their crochet as they went.
Filet crochet
Filet crochet is a French type of crochet created in squares. The finished piece looks like a grid with open and closed spaces. The combination of open and closed results in flat pictures of roses or swans or whatever.
Filet designs were originally used to make lace curtains to cover cottage windows. These days filet crochet is used for table cloths, place mats and can be hung as art.
Filet crochet can be done in the round and resultss in beautifully intricate designs.
Tapestry crochet
Tapestry crochet is used to make thick baskets and rugs. It is a sturdy technique and the items are very firm.
You use several colored threads at once, working with one color and carrying the rest along the top of the row being worked. This makes each row very thick.
Color is changed on a stitch by stitch basis. Bowls are a good example of tapestry crochet.
Tunisian crochet
Tunisian crochet is also referred to as afghan crochet. For Tunisian crochet you use a special hook (called a Tunisian crochet hook), which typically has a crochet hook at one end and is as long as a knitting needle and has a knitting needle stop end at the other. So really it is like a knitting needle but with a hook and not a point.
Below are my two favourite Tunisian crochet hooks, (in my size 5mm as usual), and these have hooks at both ends opening up the possibilities for advanced Tunisan crochet work.
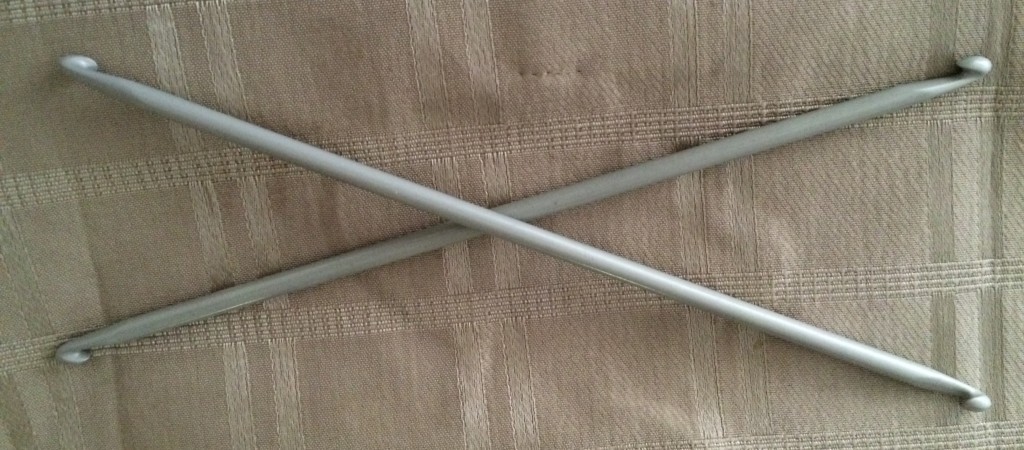 Tunisian crochet hooks come in all the same sizes as regular crochet hooks. With Tunisian crochet you carry many stitches at once on forward rows and hook them off on the backward rows.
Tunisian crochet makes a very thick fabric and is normally used for blankets, cushions, bags and soft furnishings.
Tunisian crochet is like a combination of crochet and knitting all in one. It is an advanced technique. Tunisian crochet can be combined with entrecôte crochet.
[/et_pb_text][/et_pb_column][/et_pb_row]
More Articles
If you enjoyed this post your may like some other articles from our blog.
[/et_pb_section]
by Alison | Crochet Basics
Tension and Gauge Swatches
Make your garment the same size as the pattern intended
Gauge swatches are a fundamental tool in the world of crochet and knitting.
They typically measure 4 inches or 10 centimeters square, and their purpose is to ensure that your project turns out just right.
New Project New Swatch
When you embark on a new project, the pattern provides guidelines, specifying the ideal hook size and yarn to use.
However, in the real world of crafting, we often find ourselves reaching for the yarn that’s readily available, and it may not match the pattern’s recommendations.
This seemingly small deviation can lead to a project that turns out either too large or too small compared to what the pattern intended.
This is where the importance of making a gauge swatch, or as some call it, a tension square, becomes evident.
A gauge swatch is your safeguard against potential mishaps in your crafting journey.
How To Create a Guage Swatch
To create a gauge swatch, you select the yarn you intend to use and pair it with the hook you plan to work with.
Then, you crochet a small square that adheres to the pattern’s specifications for the gauge.
This usually involves making a square that’s 4 inches by 4 inches or 10 centimeters by 10 centimeters.
Too Big or Too Small
- If the swatch is too small then you should use a larger hook.
- If the swatch is too big then you should use a smaller hook.
The idea is to use the hook that results in the same measurements as the original pattern.
Tension
The purpose of this little square is to test your tension, which is how tightly or loosely you crochet. Everyone’s tension can vary slightly, and it can even change from project to project.
By creating a gauge swatch, you can see if your tension matches the pattern’s requirements.
If your square turns out too large, it indicates that you are crocheting too loosely.
Conversely, if it’s too small, you’re crocheting too tightly.
The beauty of the gauge swatch is that it allows you to make adjustments before you dive into the main project.
If your swatch doesn’t meet the pattern’s gauge, you can experiment with different hook sizes until you achieve the correct tension.
This small but essential step can save you hours of work and prevent the disappointment of ending up with a project that doesn’t fit or look as intended.
When to Do a Gauge Swatch
Size and tension matters more in garments that have to fit like clothes rather than blankets or throws which are still ok if they are a little bigger or smaller.
When you start a new pattern always do a test swatch to make sure you will have the correct size at the end.
A Practice Run
So, in the world of crochet, the gauge swatch is like a practice run, a test drive, ensuring that your creativity aligns with the pattern’s specifications.
It’s a valuable tool that empowers you to take control of your crafting and achieve the desired results.
Remember, while the initial excitement of starting a new project can be irresistible, taking the time to create a gauge swatch is a wise and caring step that ensures your crafting journey is smooth and successful.
Author Bio
Alison Heathcote, a passionate crochet enthusiast and dedicated business blogger, combines her love for crafting and entrepreneurship to inspire and connect with others.
With a knack for transforming yarn into beautiful creations and a flair for sharing valuable insights about running a successful crochet business, Alison embodies the perfect blend of creativity and practicality.
More Articles
If you enjoyed this post and crochet is your thing, you may like some other crochet articles from our blog.
by Alison | Crochet Basics, Crochet Patterns
by Alison Stapleton
Features of a crochet diagram pattern
In general
Reading a written crochet pattern assumes many things.
Such as:
- That you can read English
- That you use either UK or USA stitch names
- That the pattern is written correctly
- That the pattern instructions are clear
Let’s look at each one by itself.
It assumes that – you speak English
I speak English as probably you do to as you are reading this. But I also like to use patterns from other countries.
I think the Japanese crochet diagrams are the best. They are clear and precise and I don’t have to read Japanese to use the patterns.
Likewise, if I design a crochet garment and I only write the pattern in English words, then other world wide crocheters can’t read my work.
I want my designs to be used by all crocheters and that is why I write the pattern in English and draw the crochet stitch diagram to go with it.
Almost every pattern on my site and my books are both written and have a diagram.
It assumes that – you know the difference between a UK or USA stitch
The difference between UK and USA crochet stitches and why the diagram is clear.
The UK double crochet and treble crochet are the same as the USA single crochet and double crochet.
The actual stitch is the same but the name of the stitch is different.
Double Crochet (USA) is the same as Treble Crochet (UK)
- Yarn over hook (two loops on hook)
- Insert hook into stitch below.
- Yarn over hook, and pull through stitch below (three loops on hook)
- Yarn over hook, pull through two loops (two loops remain on hook).
- And then, yarn over hook, pull through two loops (two loops remain on hook).
- Yarn over hook, pull through last two loops (one loop remains on hook).
It assumes that – the pattern is written correctly
In a written crochet pattern there are lines of code for the pattern rows. Such as:
RSF R1, yoh (rep5.) 3tr, 2ch 1FPst (rep. from * to * 8 times) turn.
Now in the above sentence (if it is a sentence), any error in the typing (a typo) will create an error in the pattern. And the crafter will not be able to complete the garment because she can’t read the pattern.
In a long pattern with motives, sections and finished borders there could be over 100 lines of pattern instruction. One line will create a problem and often there are two or three errors in a pattern.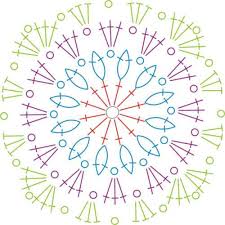
This makes the whole job a frustration and the crocheter may give up and (this is the worse part), tell others that your patterns are always incorrect and they should avoid them.
This is not good if you are in the business of selling patterns.
It assumes that – the instructions are clear
There comes a time in written crochet patterns when they will benefit from more explanation. This is achieved by expanding on the instructions and writing instructions in plain English.
We can all do with clarity at times. And crochet patters are no exception.
If a pattern is too hard to understand because of how it is written then it will not work. That pattern is no good.
Crochet diagrams symbols
Diagram symbols
In diagram a there is one symbol for every stitch.
Chain
Slip stitch
Double crochet
Treble crochet
Each symbol is drawn separately.
Diagram rows
Each row is numbered.
Every row has an arrow indicating which way the row is worked. Either left to right, right to left or in the round.
Typically each Rosie drawn in a different color so you ca clearly see which row you are on. Here I use black and blue to separate the rows.
Benefits of crochet pattern diagrams
A picture is worth a thousand words. And this is true of crochet diagrams.
- Uses left brain of visual imagery.
- Designer can be non-native English speaker.
- The diagram can be read by everyone on earth.
- Clarity uses less space. One page for each project.
- Can be printed bigger for older eyes.
- Kids can use them.
You may also like:
by Alison | Crochet Basics
by Alison Stapleton
Many crochet projects use pattern and color to add to the beauty of the item
Crochet excels at being flexible and there are so many patterns and color ways to choose from it can become overwhelming at times.
Knowing when to use either pattern or color is important to the aesthetic integrity of your item.
It is not usual to mix pattern and color changes together in the same garment.
When to use pattern stitches
 Use a pattern stitch with a yarn that is a plain solid color.
Use a pattern stitch for a garment that is one color all over.
Do not use pattern with a variegated yarn and do not use pattern with multiple colors as you can’t see the beauty of the pattern in amongst the color changes.
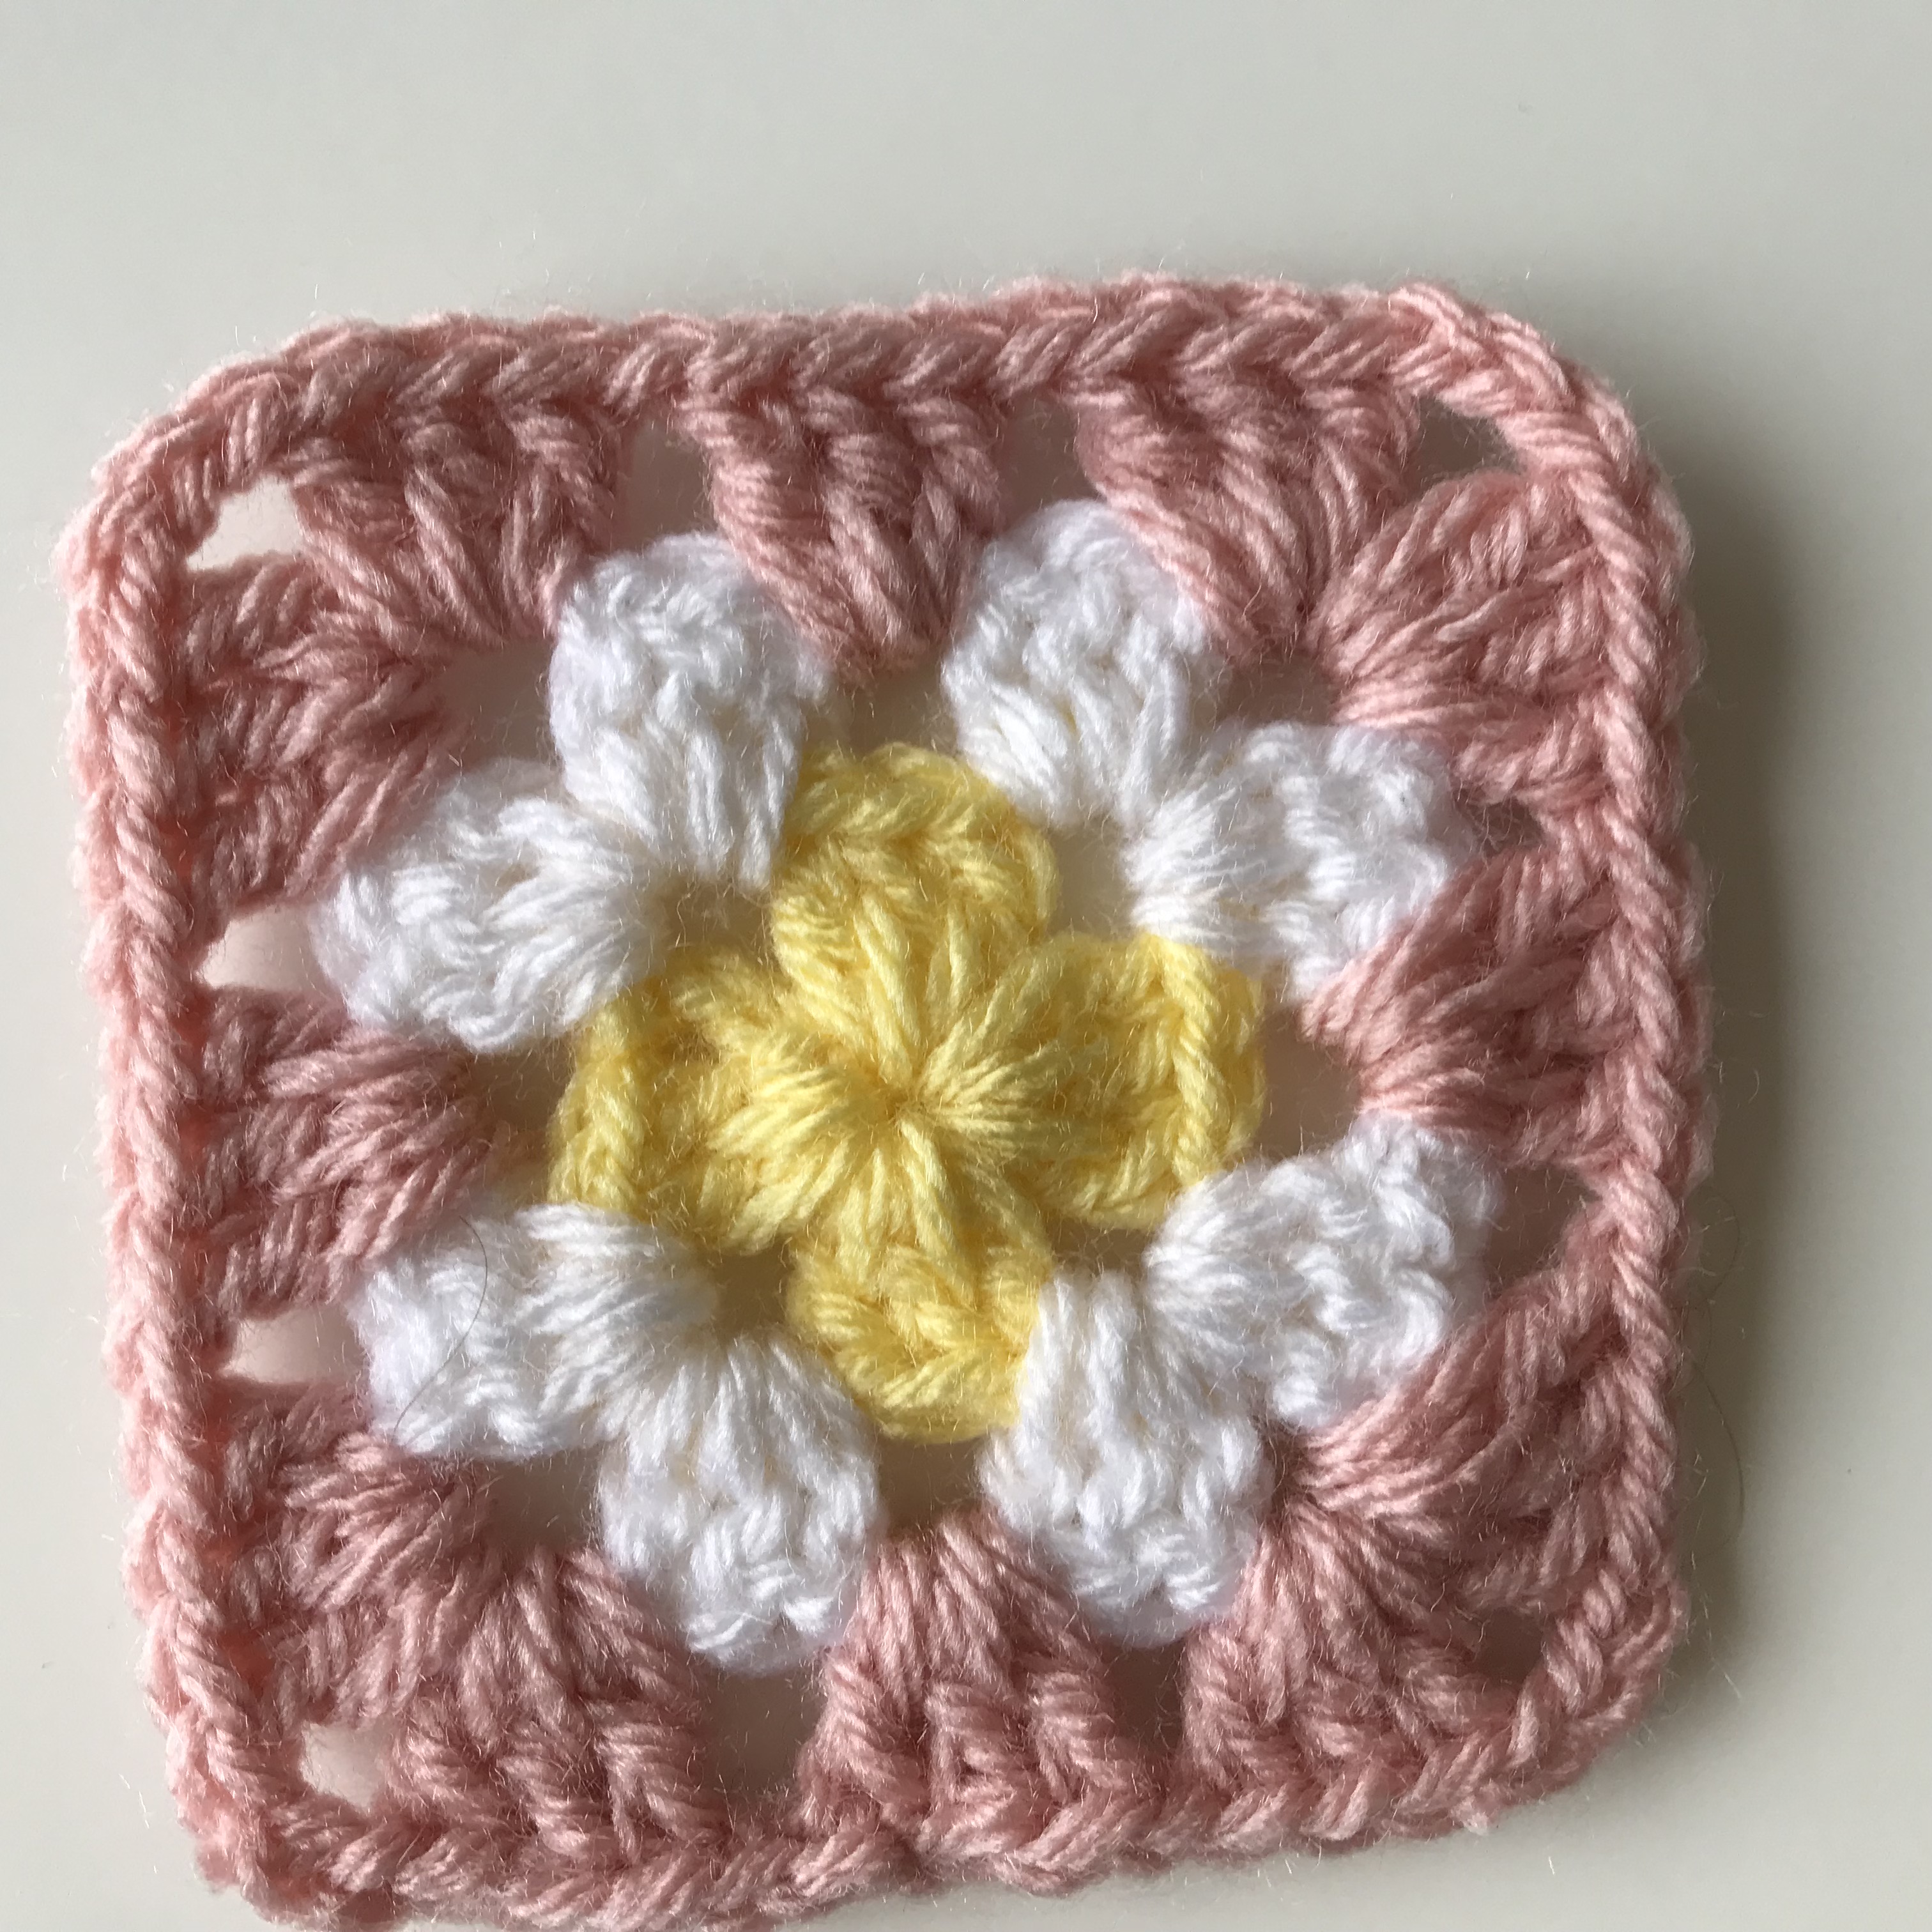
- An example of pattern over color is this intricate white square.
When to use color combinations
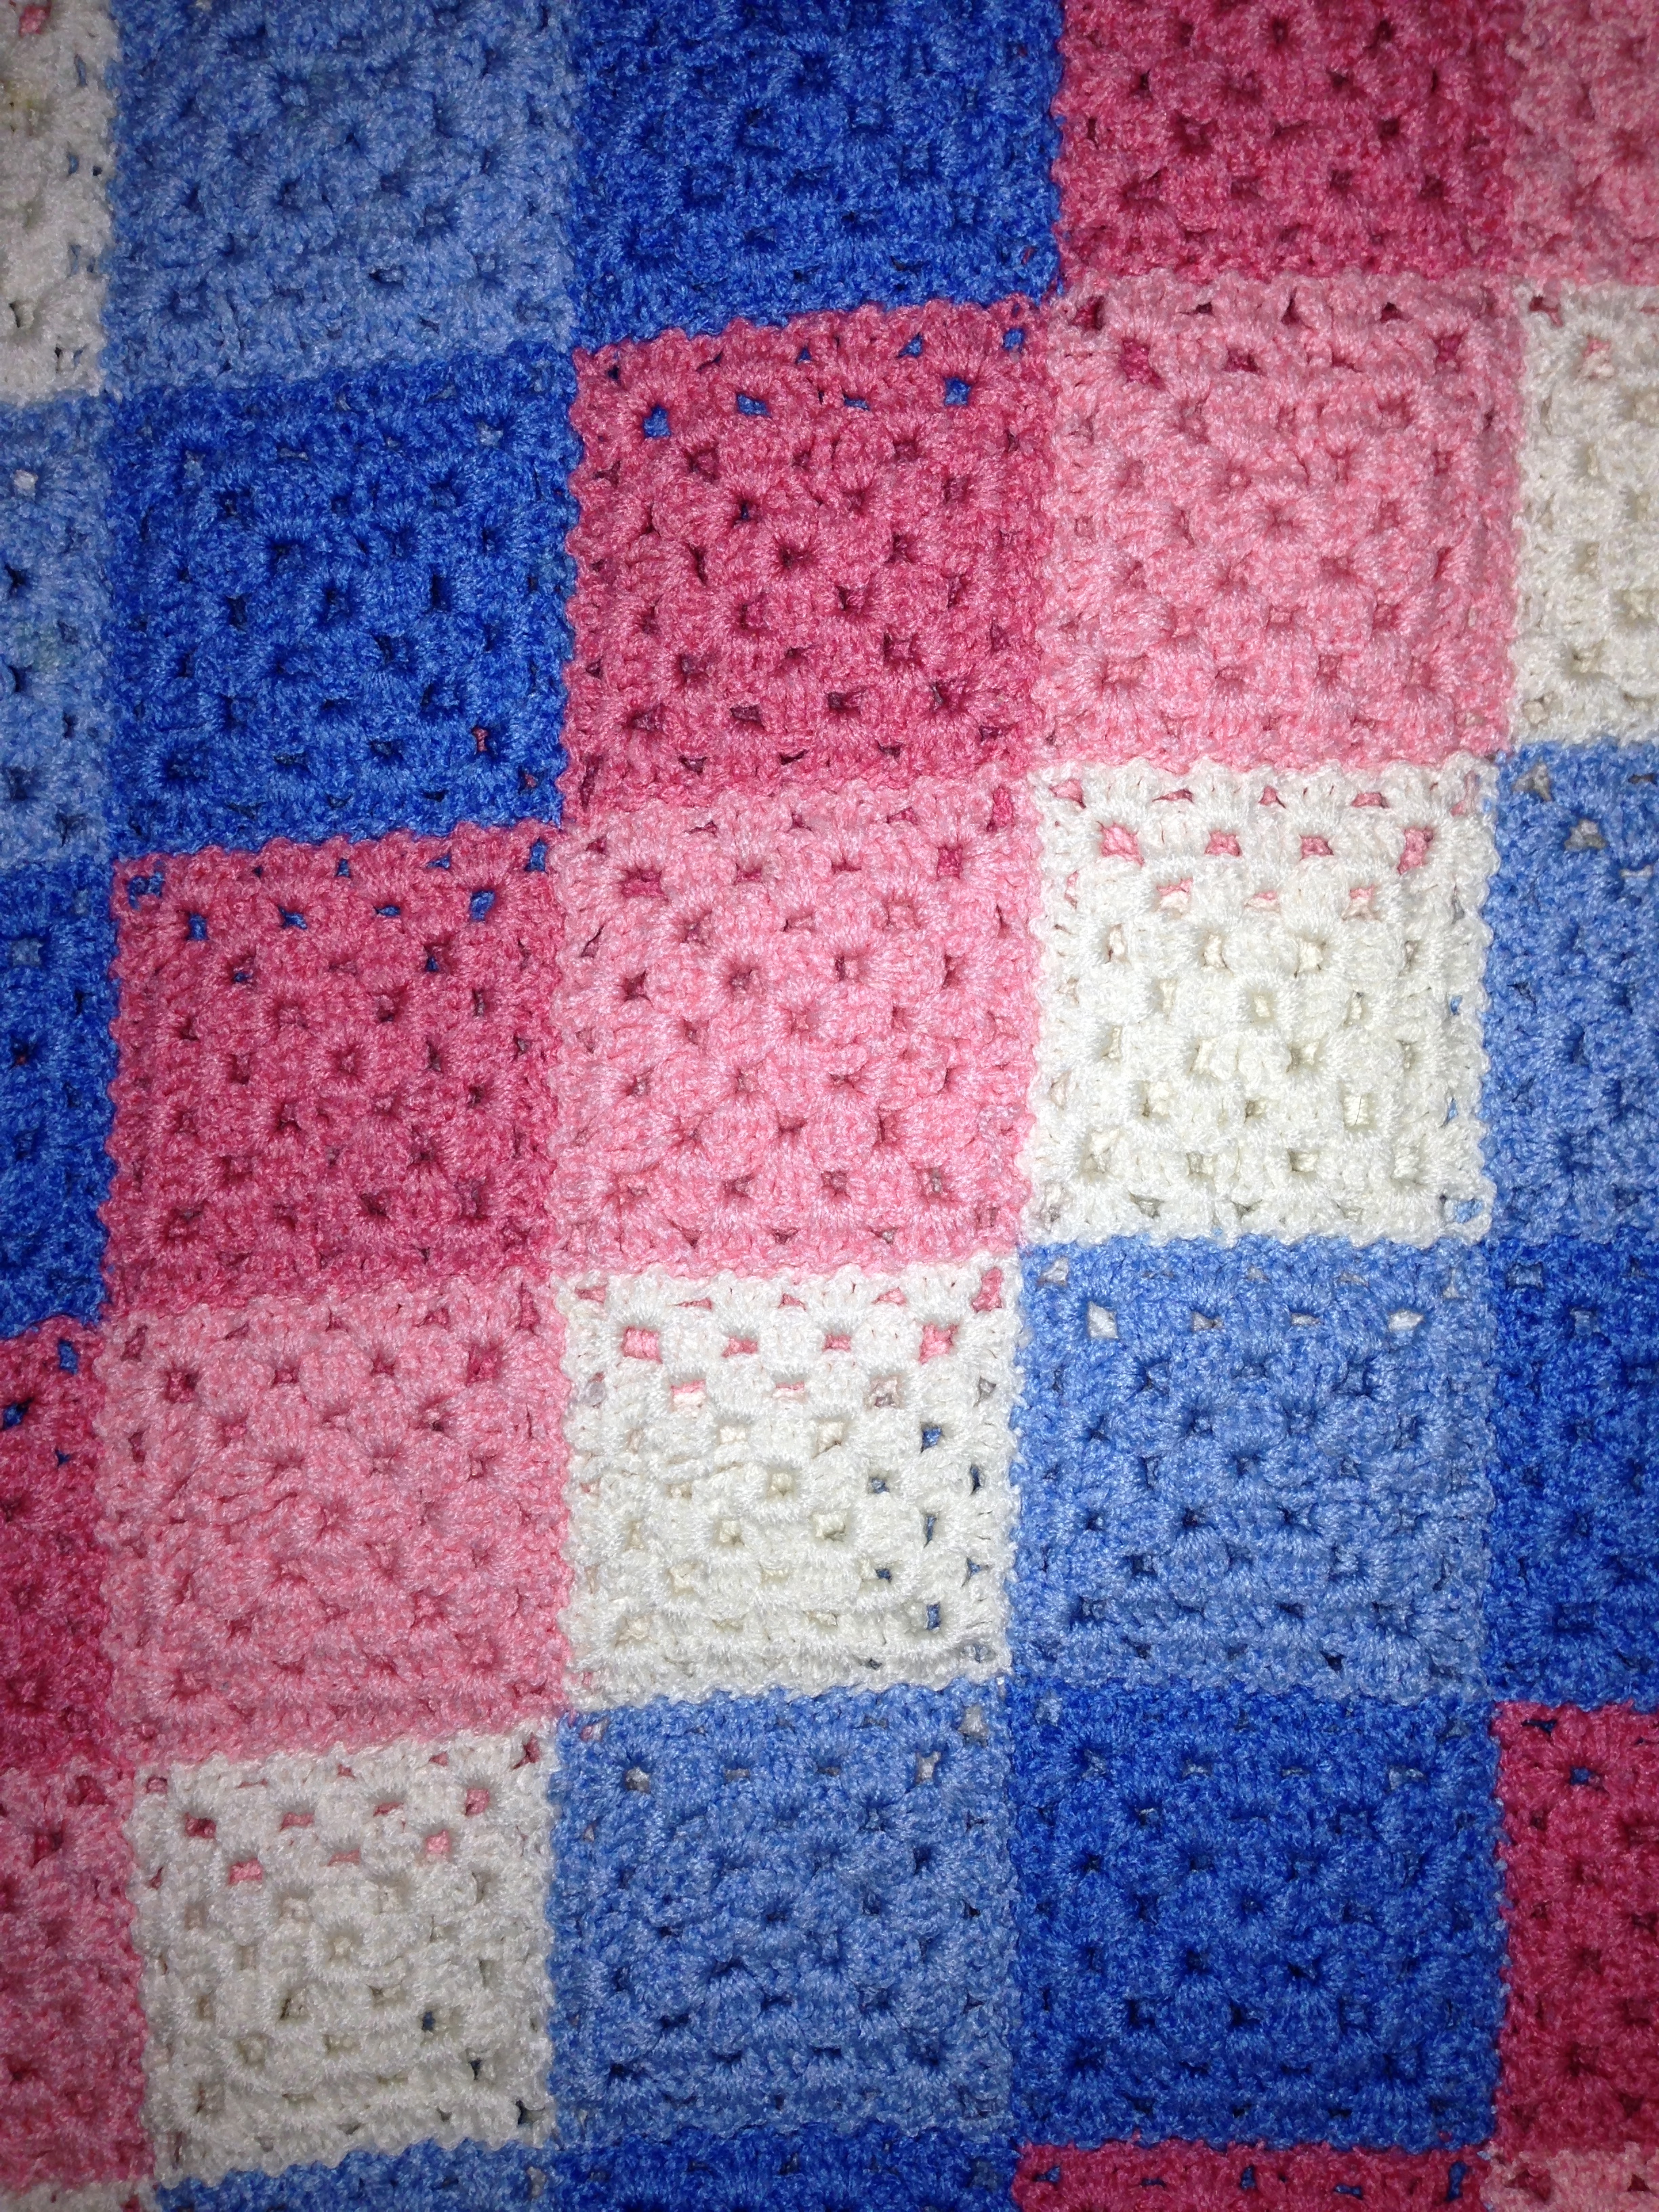
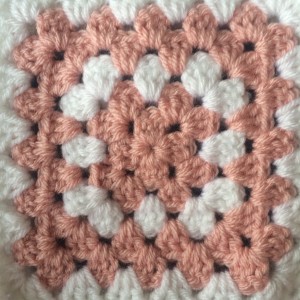 Color is best used on plain stitch items where the stitches are all the same and the color changes and combinations add to the beauty of the item.
- An example of color over pattern stitches is the granny square.
By spending some time choosing your color and patterns wisely you can vastly improve your handcrafted crocheted items.
by Alison | Crochet Basics
by Alison Stapleton
Crochet Hook Sizes
Crochet hooks are measured in different sizes and the two types of measurement are metric and imperial.
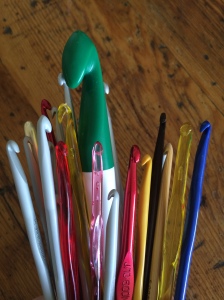
Metric Size Hooks (UK)
Metric hook sizes are measured in millimeters (mm).
This refers to the diameter of the hook.
Such as:
1.25mm, 2mm, 3.5mm, 4mm, 4.5mm, 5mm, 5.5mm, 6mm, 7mm, 8mm, 9mm, 10mm, 1mm, 15mm and 20mm.

Imperial Size Hooks (USA)
Imperial sizes are usually feet and inches and in this case crochet hooks are given a letter of the alphabet.
Crochet Hook Size Chart
Old US sizes
|
Metric
|
| A |
0 |
2.00 mm |
| B |
1 |
2.25 mm |
| C |
2 |
2.75 mm |
| D |
3 |
3.25 mm |
| E |
4 |
3.50 mm |
| F |
5 |
3.75 mm |
| G |
6 |
4.00 mm |
|
7 |
4.50 mm |
| H |
8 |
5.00 mm |
| I |
9 |
5.5 mm |
| J |
10 |
6 mm |
| K |
10 ½ |
6.5 mm |
| L |
11 |
8 mm |
| M |
13 |
9 mm |
| N / P |
15 |
10 mm |
| O |
|
12 mm |
| P / Q |
|
15 mm |
| Q |
|
16 mm |
| R |
|
19 mm |
| S |
|
25 mm |
Hook materials
Crochet hooks can be made from many materials but the usual ones are:
- Steel
- Aluminium
- Bamboo
- Hardwood
- Plastic
- Glass
Bamboo and plastic crochet hooks bend and this can slow you down. The best hooks are made from steel, aluminum or hard woods like rosewood.
Aluminum crochet hooks come in different colors for each size so you can see immediately the difference between a 4.5mm hook and a 5mm hook.
Collecting hooks
Over time you will collect many crochet hooks in different sizes and also hooks in the same size so you can have one for each project or every place which you crochet.
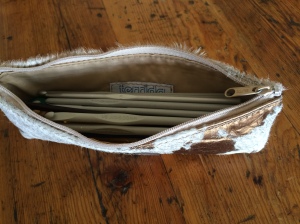
For example I have one crochet hook in the kitchen drawer for squares and one in the car also for squares.
I also have a hook next to my chair in front of the TV for the bigger projects and blankets.


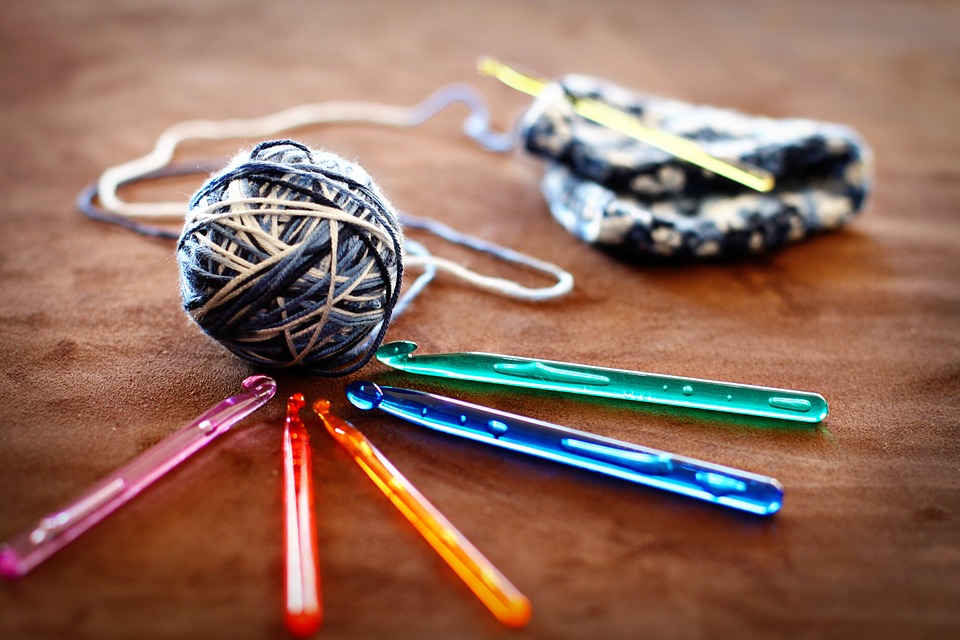
 Tunisian crochet hooks come in all the same sizes as regular crochet hooks. With Tunisian crochet you carry many stitches at once on forward rows and hook them off on the backward rows.



 Use a pattern stitch with a yarn that is a plain solid color.
 Color is best used on plain stitch items where the stitches are all the same and the color changes and combinations add to the beauty of the item.

